Showing posts with label DIY. Show all posts

Wednesday, September 22, 2010

Summer Projects Before and After

Its hard to believe its the first day of fall. Summer always flies so quickly and there are always so many things that I want to do and, of course, only get to around half of them. I was looking through a few photos the other day though and was encouraged to remember what some of my little projects looked like in the 'before' moments. I thought I'd share a few of these with you.

BEFORE:  This was our bedroom before I painted it.


You can't really tell from the above pictures, but this is what the walls looked like up close. The previous owners had this done in venetian plaster. Although its lovely as modern art, its not exactly relaxing and it is really hard to decorate with.

AFTER: I simply painted it, bought a crown, and a few drapes to hang up behind the bed.


We also got a new duvet cover from Restoration Hardware. Although I usually like to buy antiques, I do like new fresh bed linens!

We bought two of these wonderful antique lights from a friend who is an antiques dealer and then amazingly found two more at another antique shop. I don't know if they are common, but its pretty difficult to find four working antique sconces like this and we needed four for this room. They may be a little over the top for a bedroom, but we like them :) And we put them in ourselves, which was my first 'electrical' project!


BEFORE: Here is another little project we did. The front of the house had some weird gray patches to it, so we bought some lime paint (good for stucco houses) and painted it
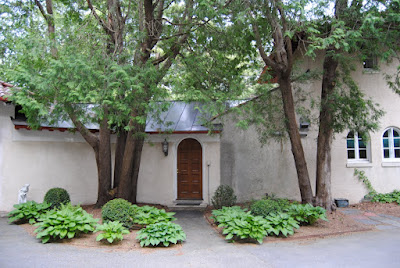

DURING :)


AFTER: Just a little day project, but it made a significant difference to our entry way. We also transplanted the hosta to  another location, as it was getting a little unruly there.


BEFORE: The front of the house also had some really random landscaping in the front and the climbing hydrangea was climbing in a strange way.

AFTER: So we cleaned all this out, cut the hydrangea back so that it can grow properly and put in four nice little boxwoods. We also got some banana plants and put them out front. It makes me feel like I am in the tropics.. and not Vermont!


BEFORE: This is the walkway up to the gazebo. It is nice, but the deer have munched all our rhododendron and the gazebo needed to be painted (although you can't tell from this picture).


AFTER: We had been wanting to put statues here and we randomly drove by this place one day that had these wonderful statues. I also painted the gazebo. I think it makes it really made a big difference.


BEFORE: This was our back patio. The stairs were a mess and the house had those grey blotches.
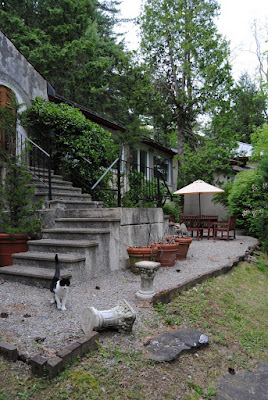


AFTER: My husband power-washed the stairs, I painted the house, and planted a nice little kitchen garden in pots all around.


BEFORE: We had this open field that didn't really have any purpose.
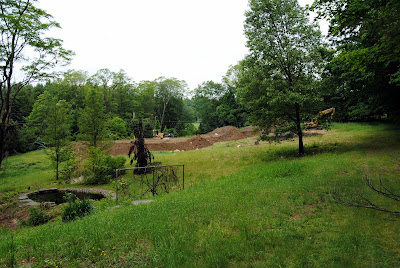

We decided to put in a tennis court.
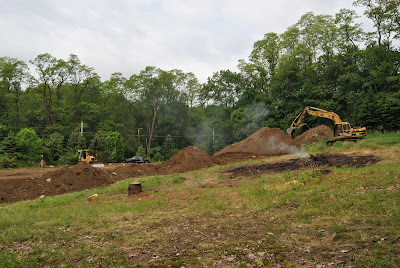

And plant a little vineyard. These are the little grape plants when they arrived.

AFTER: We obviously had someone put the court in for us, but we planted the grapes ourselves. The grass is still growing and the grapes are still small... but they are on their way!


And we're really enjoying the court!


Anyway, after quite a full summer, I am looking forward to rest that fall and winter often bring. Time to curl up with my mug of hot apple cider and relax.

Almost...

(just started on this one the other day)
The AFTER to come :)

Tuesday, March 2, 2010

A coat of paint covers a multitude of sins

1 Peter 4: 8 says
Above all, love each other deeply, because love covers over a multitude of sins.

This weekend I did some painting of a bathroom and closet that desperately needed it. The above photo was from the closet... a hideous blue that hadn't been painted since the 50's or 60's probably. Anyway, I got thinking about how a fresh coat of paint is like love to a house... it covers a multitude of offenses.

I have done my fair share of renovations over the years. I may not be Martha Stewart, but I'm getting there. My husband jokingly calls me Martha sometimes and I call him Norm (from This Old House). Our first house was a Victorian from about the 1840's and needed a complete renovation inside and out... and we did it all ourselves. Here is a before picture of the outside (well actually mid-renovation):


and this is after...
Not bad if I do say so myself. The house is about 3500 sq. feet, which is quite a good amount of surface area. Unfortunately I'd have to go digging through boxes of photos to find the 'before' pictures of the inside, as they didn't exactly make the cut into my photo albums, but picture the entire thing done in 60's/70's floral wallpaper - mostly in hues of pinks. I'll just tell you right now, it was not a pretty sight. Here are a few of the inside though after the renovations. With the kitchen, we completely gutted it and put in all new appliances and cabinets. The floors were covered in a horrible laminate tile, and when we took it up, we found these great wood floors that we then sanded and stained.


When we pulled up a greenish 60's carpet in the living room, we found this amazing Axminster carpet underneath, so we decorated to match the hues of the carpet.

This is a shot of the living room into the dining room and with the study past that. This was at Christmas apparently... with the stocking hung by the chimney with care ;)
We used mostly neutral colors, except for the kitchen (which I like to be bright and sunny) and a bathroom, which I painted red. A small space and the color red = getting high on paint fumes, as I learned it can take 3 coats in order to get the correct color of red.

Besides this renovation, we also bought a 4 family house a few years back and renovated that completely (about 6,000 sq. ft). What a crazy adventure that was, especially as I was in the midst of grad school! Fortunately, we were able to flip it before the market turned sour.

Then, about a year ago we moved to an amazing house that looks a bit like an Italian villa:
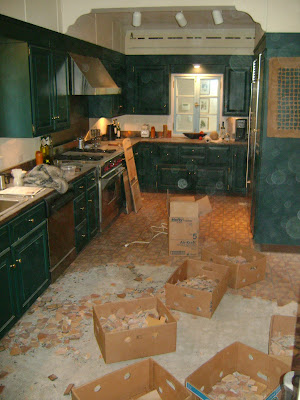
and although it is wonderful, it did need a little bit of work. The first major thing was the kitchen. The cabinets had been painted in the 90's and were a teal green color and the orange/yellow tile floors went back to the 60's in my estimation. It was not a pretty color combo and very dark.

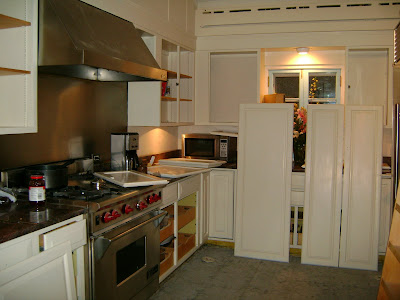
We brought in some interior decorators to see how much it would be to re-do it and they were throwing around numbers like $80 - 100,000! Well, the DIY'ers that we are said no to that and we did it ourself:

When I decorate, I like to save pictures of the things that I am attracted to. I found that I was really drawn to the white kitchens that I saw, so we decided to paint the cabinets white (Sherwin Williams, navajo white). In order to paint cabinets, be aware that you really need to sand them and clean the surface well.

I was also really drawn to travertine natural stone, so we got the chiseled edge Pietra Art travertine from Florida Tile in 'picaso'. We had it professionally installed, since we didn't want to mess with that.. but this whole renovation ended up costing around $10,000, as we decided to put in a new soapstone counter top and sink as well, which I love! Considering that kitchen renovations are one of the best places to see a high return, I think we did pretty well! Here is the finished kitchen. I found a great little butcher block island at an antique store, and we hung some peppers and garlic knots for the 'Italian' villa effect. The wall color is Sherwin Williams 'blonde'.


So here are some things I've learned during my DIY years:

* Always write down your paint colors and brand or keep the can if you are able.. you will almost always need it again to do a touch up or repair a hole at some point or another.

* All whites are NOT created equal. There are almost an infinite shade of whites. You can't just think, 'oh I'll touch up that window sill with some white'. We learned this the hard way by not writing down our paint colors when we first were married. We touched up a bunch of places that we thought were the same white.. but found out later when it dried that it was a different white and it looked much worse than it not being touched up at all. So I've learned to go with one brand and type of white and use it everywhere. It gives consistency and you don't have to write down where each color 'white' is painted.

* Buy good quality paint. I can't emphasize this enough. The one-coat kinds work wonders and will save a lot of time!

* You will almost always have to do multiple coats when painting white over a darker paint.

* Darker colors such as reds will sometimes need THREE coats of paint. It looks beautiful.. but be aware it takes longer.

* Preparation is key! Clean surfaces well, so you don't get dust in your brush or roller.

* Always use a drop cloth, no matter now careful you are. I once painted my bedroom (when I was still under my parents roof) and after I was done, I accidentally knocked over the paint can onto the rug! (It needed to be replaced anyway :P )

* Doing it yourself is always a learning experience. Have fun with it. Do a little grafitti before you paint; draw hearts on the wall; get a little paint in your hair; and be proud of the love you've given to your home.

LinkWithin

Related Posts with Thumbnails